Blog / Tutorial

How editing photo to Polaroid effect

Δείτε πως μπορείτε να μετατρέψετε μία φωτογραφία, σε στυλ Polaroid, μέσω Lightroom & Photoshop (Camera Raw)

DTO_8197DTO_8197-2

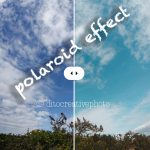
Παρακάτω θα δείτε όλες τις ρυθμίσεις που πρέπει να κάνετε, για να δημιουργήσετε το Polaroid Effect, μέσω Lightroom Classic (ισχύουν και στο Photoshop, μέσω του Camera Raw)

  • Temperature 5500,
  • Tint 17

white balance

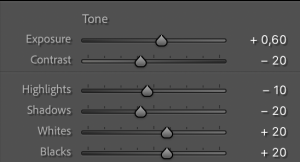
1. Exposure and Contrast

  • Exposure: Increased by +0.6 
  • Contrast: Decreased to -20 
  • Highlights & Shadows: Both reduced to -10 and -20 respectively 
  • Whites & Blacks: Both increased by +20

Exposure and Contrast

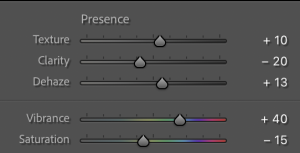
2. Presence and Detail

  • Texture: Increased to +10 
  • Clarity: Decreased to -20 
  • Dehaze: Increased to +13 
  • Vibrance: Significant boost of +40 
  • Saturation: Decreased to -15 
  • Grain: Added grain with an amount of 40, size 25, and roughness 50 

Presence and Detail

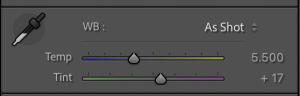
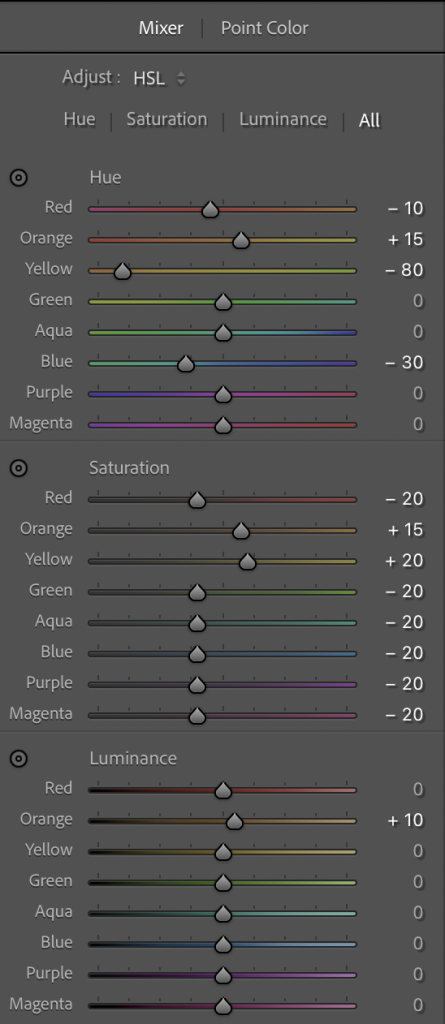
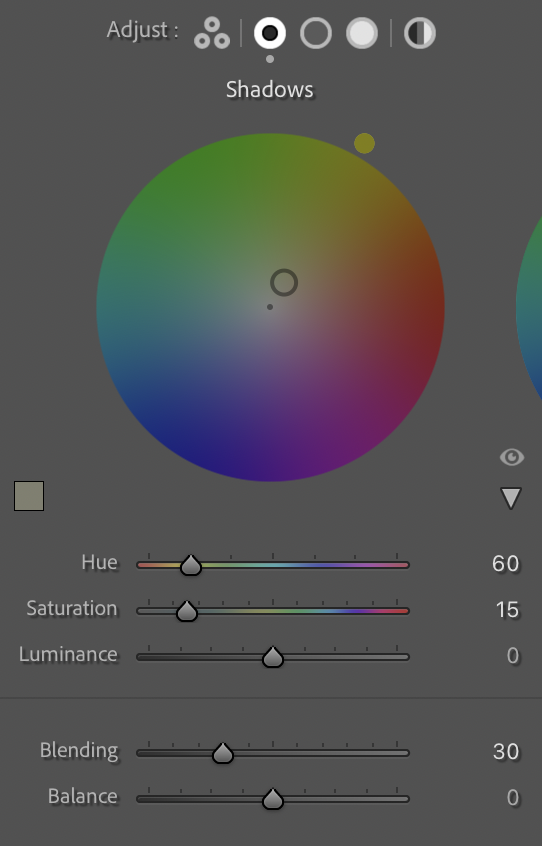
3. Color Grading and HSL

  • Yellows: Major shift in hue (-80) and increase in saturation (+20) 
  • Oranges: Increased hue (+15) and saturation (+15), with a luminance boost of +10 
  • Blues: Decreased hue (-30) and saturation (-20) 

Color Grading and HSL

  • Split Toning: A yellow/orange tint was added to the shadows (Hue 60, Saturation 15) 

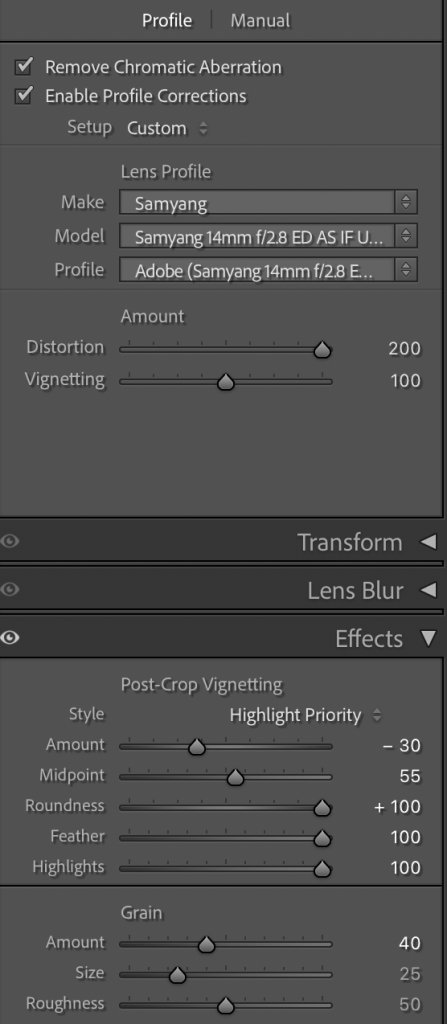
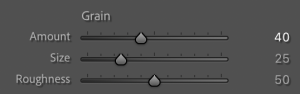
4. Effects and Optics

  • Vignetting: A post-crop vignette was applied with an amount of -30, featuring a high feather (100) and roundness (100) 
  • Lens Profile: Lens profile corrections were enabled for the Sigma 135mm lens 
  • Tone Curve: A custom multi-point tone curve was applied (Points: 0, 23, 28, 44, 65, 72, 128, 133, 191, 191, 254, 254) 

Effects and Optics